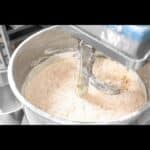
Mixing Dough
How to mix dough with a mixer? In here you will know how to do it…
…either you can make it by hand or with a mixer. This is a term that is often used. And, for the most part, mixing is taking our flour, water, salt, and yeast and combining them to form dough. Mixing is, at its most basic level, about dough structure, and it is the start of each baking experience.
However, mixing bread dough has its own set of complexities and oddities, and there are some significant choices to be made regarding how we proceed. All of these choices will have an effect on the crust (the surface) and crumb (the inside) of our yet-to-be-born loaves, which will rise from the embers of our ovens like phoenixes on their way to home-baked greatness. In here we also have a review for best commercial dough mixers on amazon that you might want to see
How to Mix Dough With A Mixer
Step 1: Preparing Your Ingredients
That seems easy enough, doesn’t it? And it often is. However, it is also critical! This is the stage of the bread-baking process at which we make some of the most important choices concerning the kind of bread we will create. Whether we’re making a shopping run or going through our cabinets, this is always our first step, and it has a significant influence on how we proceed
Step 2: Weight You Ingredients
This is exactly what it sounds like, and it is critical! When baking, use a scale. Permit me to restate that. When baking, use a scale. Measuring cups and spoons are insufficient: volume estimations might vary by up to 50% depending on how densely packed your flour or other components are. A scale guarantees that your dough always comes out uniformly. Always weigh your ingredients meticulously and individually. Pay close attention to the kind of yeast you’re using and the amount required. Acquaint yourself with your scale’s tare (zeroing) function—it enables you to disregard the weight of your measurement containers, which makes it simpler to weigh your ingredients precisely.
Step 3: Combine Your Flour and Water and Allow to Autolyze
After gathering and measuring our components, we’re ready to begin mixing. If you have a stand mixer, you can mix dough with that mixer too, but working by hand works just as well.
If using a stand mixer, begin by pouring the water into the mixing bowl, followed by the flour. This will assist prevent flour from sticking to the bottom and clumping—clumps of flour result in lumpy bread. (For those of you who are using active dry yeast, this is a good time to bloom it according to the manufacturer’s directions. When doing so, be careful to subtract the water you use from our overall calculation; otherwise, you will affect the total moisture level of our dough). Set your mixer to a medium-low speed to begin mixing the flour and water. This is referred to as integrating in baker-speak.
When your flour and water begin chasing one another, your dough may seem very dry, and you may believe you’ve made a mistake. Do not be afraid! Allow it to ride until there are no more dry pockets of flour remaining. Scratch the edges and bottom of the bowl a couple of times with a wet dough spatula—or another flexible bench knife—to ensure that all of your flour is included.
Step 4: Add Salt and Yeast to the Mix and Develop Gluten
While salt contributes to the overall health of our gluten network, it is also very water-hungry. If we added salt to our autolyse, it would fight for water with our proteins and carbohydrates, causing them to dehydrate more slowly. While this is not a calamity, we have already committed to a five-hour project here, so why complicate matters?
And, as for the yeast, it is responsible for fermenting our flour, which causes the bread to rise and acquire taste. However, mixing—and particularly autolysing—is not about taste on a chemical level. It is a matter of structure. If we added yeast during the autolyse, it would begin spewing gas. When we resume our kneading movements later, we will just end up beating out this gas. In summary, the yeast has no function during the autolyse.
Witha stand mixer, add the salt and yeast to the autolysing dough and knead on a low speed until you can no longer feel any graininess in the dough—a few minutes should enough. If you’re using active yeast that has been bloomed, the water in which it bloomed is also added. Be cautious: if you stand over it being inquisitive, some of the water may spill out and smack you in the face. If this occurs, estimate the quantity of water you believe was lost—unlikely it’s to be more than a tablespoon or two.
Step 5: Cover Your Dough; the Temperature is Rising
Wrap the bowl in plastic wrap and tidy up your station. And with that, our first rise, or bulk fermentation, has begun. After mixing dough with mixer, don’t forget to clean the dough mixer after using it
Our Latest Post:
💻Crepe Maker |Huge Kitchen Utensils | How Does Pellet Smoker Work?
Was this helpful?
Hi there! I’m a food enthusiast and journalist, and I have a real passion for food that goes beyond the kitchen. I love my dream job and I’m lucky enough to be able to share my knowledge with readers of several large media outlets. My specialty is writing engaging food-related content, and I take pride in being able to connect with my audience. I’m known for my creativity in the kitchen, and I’m confident that I can be the perfect guide for anyone looking to take their culinary journey to the next level.


